Lava Wrap Volcanic Rock Exhaust and Header Wrap

Lava Wrap Volcanic Rock Exhaust and Header Wrap


Made from crushed volcanic rock (basalt fiber), our Lava Wrap has all the same benefits as exhaust wrap, but with that trick carbon fiber appearance and improved durability. This exhaust wrap is 25-percent stronger than fiberglass wraps, giving it a prolonged life and greater durability.
Using Lava Wrap on a header and exhaust system maintains hotter exhaust gases, decreases gas density, and allows the exhaust gas to flow through the system at increased velocities. Greater exhaust scavenging is produced, pulling intake gases through the cycle faster, helping to lower air intake temperatures. This gives you more horsepower, and also reduces radiant heat damage. Lava Wrap lowers under-hood temperatures by as much as 50 percent.
Heatshield Products Lava Wrap withstands continuous temperatures of 1,200-degrees Fahrenheit and intermittent 2,000-degrees Fahrenheit. Please note this is a real world tested rating, so beware over inflated temperature ratings of similar basalt/volcanic rock products.
Installation is easy: wrap it around your exhaust pipe, using overlap to hold itself in place (like a hockey stick or tennis racket grip) and use our Thermal-Tie, hose clamps or wire products to secure the ends in place.

Lave Wrap 

Features
Reduce under hood temperatures up to 50%
Can increase horsepower
25% stronger than fiberglass wraps, all rolls 1/16" thick
Made in The USA 

Required Equipment
Scissors or utility knife
Dust Mast
Safety Glasses and Gloves
Spray Bottle or Bucket (optional)

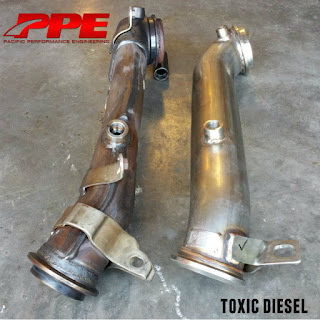
Duramax Downpipe by PPE Diesel 

Installation Tips 
Wrapping headers and exhaust pipes requires patience. Go slow and take your time. Make the wrap as tight as possible – this will hold the wrap on the pipe better and retain the most heat in the system.

Soaking The Wrap in Water

 Soaking the wrap in a bucket of water is NOT necessary. You may spray the header/exhaust wrap with water. Spraying exhaust wrap with water as you work can make installation easier and also reduce the amount of fibers. It will not cause it to shrink, but it makes it stick to itself better.

A Wet and Dry Wrap

If you are installing wrap on a motorcycle or powersports application, we recommend a 50% overlap instead of the ¼” overlap during the installation process. 

Install and Finish Product

866-488-6942


Popular posts from this blog

Duramax 6.6L Valve Lash Adjustment

Duramax 6.6L Valve Adjustment  Duramax Diesel Pickup Truck This is one method used to set the valve lash on your duramax engine Valve adjustment should be performed anytime the heads are removed. It's also good practice to adjust valves during service that require valve cover remove.  TDC (Top Dead Center) First start with, locating the timing mark on the front engine cover and the harmonic balance.  Rotate the crankshaft in order to bring the number 1 cylinder to TDC (Top Dead Center) of the exhaust stroke. This mark should be aligned with the mark on the engine.  To adjust the valves, start by loosening all the jam nuts with a 14mm wrench, you will also need a flat screwdriver to make the adjustments. Adjust the valve using a .012" feeler gauge Use your .012” feeler gauge between the rocker arm and the valve bridge as pictured. The correct setting is had when there is slight resistance when moving the feeler gauge. It should not be so tight th

How to Remove LB7 Duramax Fuel Injectors Step By Step Instructions

LB7 Duramax Diesel 6.6L R&R Remove and Replace  Working on any automobile engine can be intimidating, and that is the very reason why mechanics stay in business, However some tasks that seem intimidating are not actually that difficult if you have the right tools and the right knowledge to complete the task at hand, The following instructions are on how to remove LB7 Duramax Fuel Injectors. This task is often considered a difficult process to complete, but these instructions will break down the process and make this task seem simple. Duramax Diesel LB7 Engine 2001-2004 GMC or Chevrolet Pick-up Truck  Drain the Coolant find the drain valve on the passenger side of the wheel well and drain the coolant. To capture the debris,use a bucket and a cloth for a filter. Caution: This step is very important to ensure the combustion chamber won't fill with coolant during the last step of removing the  fuel injectors if an injector cup pull out during this step.

Duramax Glow Plugs Operation Glow Plug Relay

                                                    Cold Weather Starts and Glow Plugs  Glow Plug System Description Duramax diesel engine, air alone is compressed in the cylinder. Then, after the air has been compressed, a charge of fuel is sprayed into the cylinder and ignition occurs, due to the heat of compression. Eight glow plugs are used as an aid to starting. The glow plug initial ON time will vary based on the system voltage and temperature. Lower temperatures cause longer ON times all the times. The ECM provides glow plug operation after starting a cold engine. This post-start operation is initiated when the ignition switch  is returned to Run, from the Start position. This operation helps clean up excessive white smoke or poor idle quality after starting. Control of the instant start system, glow plugs is determine by an electronic glow plug control unit and  4.7 volt  glow plugs, requiring  2 seconds  to heat up to  1,000°C (1,832°F)  . The temperature and t